Tuesday 21 May 2019

3 Ways with Altenew's Layered Medallions

It's time for a new edition of "3 way's with", today I am focusing on the Layered Medallions cover dies from Altenew.


The reason I like these dies so much is because you can do so many things with them. Layering options, A plus B or B plus A. Then they can be used alone, (B alone or A alone). Then there's the option to uses the die cut as a stencil, again the 4 mentioned options work perfectly. Okay, enough ramblings for now, lets get into the project details.

I will be walking you through my 3 projects which today are, 2 cards and a gift tag.


My first card uses just one of the dies, I die cut if from some texture teal card and added it to a white card. I then placed a sentiment in the center of the card. I stamped using embossing ink and heat set with rose gold crisp embossing powder onto vellum.

My embellishment is minimal with just a few Nuvo drops from Tonic studios.


Next up is a layered card, Sticking with the teal and white theme I cut one of the dies in white and one in teal, I layered them onto a lighter teal card and added a few white Nuvo drops.

I then die
 cut a heart from White card, added some light teal ink and a sentiment.


My last project is a little gift tag, I decided it would be fun to use just a section of one of die cuts as a focal point. Here I have encased it between 2 die cut hearts, the front one is a heart aperture frame, created with 2 heart dies.

I added a sentiment using the Hope stamp and die set. I cut the hope die using my mini blossom die cutting machine.

Products used


***My links to Altenew products are affiliate links, this means that I get a small commission from Altenew for each purchase made, this does not cost you any more, however it helps me be able to create more content and share inspiration.  I truly appreciate any purchase made using my links.***

Monday 13 May 2019

10 ways with Altenews' embossing paste

Good Morning crafters, today's post is a little different  than my normal 3 ways with post as I am sharing 10 ways to use Altenew's Embossing Paste.

I have been itching to get my crafty hands on this Embossing pate ever since Creativation. I have used embossing paste many many time before but as you know I am an Altenew addict, so need this in my crafty arsenal.

Heads up, this is going to be a big blog post but hopefully you'll bear with me and learn some new ways to use embossing paste.


1.Using it as a simple white embossing paste


So the most basic way to use embossing paste is straight up out of the tub.  Here I used it through a stencil and heat set it, You can leave it to dry naturally but heat setting lets the paste puff up a little which I like.


Colouring Your embossing paste

2.Mica powder


To achieve bright or light colours on dark surfaces adding mica powder to your embossing paste is a really cool option.  Remember all those little tubs you've got stashed away? Dig them out and get mixing them into your paste, I work on a glass mat and add a bit of paste and a sprinkle of powder and then mix. N.B you don't get the shimmer from your mica in this method.


3.Glitter


If you want sparkle, glitter is going to be your best friend. It not only adds sparkle but also gives a gritty effect to the paste.

4.Watercolor brush markers


Waterbrush markers can also be used to colour your paste, you wouldn't believe this is actually Altenew's Emerald water brush marker added to the paste, you can add as much or as little as you like. I like the softer look.

5.Alcohol Ink


Reach for the Alcohol inks or Alcohol reinkers you have and add a few drops to your paste, This is such a cool technique.

6.Spray Inks


Altenew's spray inks are one of my favourite products and adding them to the embossing paste is awesome. Unscrew the nozzle and add a few drops to the paste....


Using Embossing paste to adhere foil, embossing powder and gilding flakes

7.Gilding Flakes


Adding guilding flakes to your projects is a really fun thing to do, Here I adding embossing paste through a stencil and then gently put gilding flakes on top, once dry I used a soft paint brush to remove the ecess flakes.

8.Heat activated foil


Now this has to be one of the techniques I love the most.  Adding heat activated foil to dry embossing paste.  Let your embossing paste dry and then add your chosen foil on top, place between a folded piece of copier paper and run through a laminator.......Result is an awesome shiny raised pattern.

9.Embossing powder


How about adding embossing powder onto embossing paste? While wet sprinkle your chosen powder or pwders over the paste and then heat set with an embossing tool. 


Embossing paste as an undercoat to add bright colour onto black card

10.Undercoat


Lastly I stenciled onto black card with the embossing paste and left it to dry. I then placed the stencil back over the image and used Altenew's crisp inks to add colour, I used to do this with white pigment ink as a base coat but it ever seemed to dry fully and would smudge, thi sis now my go to method.


Phew, I told you it was going to be a big post. I hope I have given you some ideas and that you will look at embossing paste in a whole new way.

Thanks for joining me.

Friday 10 May 2019

Paperbabe Stamps Challenge #93

It's time for a new challenge at Paperbabe Stamps. This time around it's a layout challenge


You can use the picture above any way you wish, rotate it, flip it, Just get creative.

I have created a card to help inspire you.


I started by creating some backgrounds to stamp the flower and leaves on. To do this I used Nuvo Mica Mists in Wild Olive and Fresh Pear for the leaves and Pecan Peach and Turkish Rose for the Flower.


Once dried I stamped the leaf and Rose onto the spritzed papers and fussy cut them.
Working on a 5x7 inch white card blank I stamped a chevron strip using the DesignA tweed stamp set, I used Nuvo's Dried Oregano hybrid ink. I used the Mica Mists to flick droplets onto the card for added interest.  

On a white tag I used some soft form relief paste mixed with Nuvo Storm Cloud Shimmer powder and Rose Gold pure sheen glitter through the Stripes stencil, I love the effect this gives. I added the tag to my card and adhered the Rose and Leaves.


My sentiment was stamped onto one of the papers I created and then torn to give a distressed look. Lastly I added a scribbled border with a black fine liner and some Dusty Rose Vintage drops.

Here's the links to the Paperbabe products used in my project.

DesignA tweedStripes StencilRose layers and  Where your dreams take you stamp (currently out of stock)

For more awesome Paperbabe products please visit the Paperbabe Stamps Store. To join in with the challenge pop by the Paperbabe stamps blog where you will find all the details on how to link your project.

Monday 6 May 2019

3 ways with Altenew's Hibiscus Garden die set

Happy May Day people. 
Today I am using the Hibiscus Garden 3D die set from Altenew in 3 ways.


This die set is huge and features some seriously tropical flowers and foliage. Altenew's 3D die set layer up to create 3D images but can be used in lots of other ways too, so lets dive in and see what I made.


3D Embellishments


I guess this is the most obvious use of the dies, using them as they were intended.  I used Altenew's watercolor brush markers to add detail to watercolor card and die cut my flowers and leaves.

Very simple but so effective, as there was so much detail in the flowers I opted for a simple background using the Dotted scales cover die. My sentiment is form the Leaf canopy stamp set, I added a little bit of golden edge washi for added luxury.


Backgrounds


This has to be one of my favourite ways to use dies, taking elements to create backgrounds.  Working on wet watercolor paper I dropped in colour using the watercolor brush markers and spritzed with water.  I then sprinkle lots of sea salt over the wet background, this is where I would normally say leave it to dry naturally but I was in a hurry and used my drying tool and was so surprised that you still achieve cells where the salt sucks in the water.

I die cut several leaves and placed them onto a card allowing the to overhang the edges, I then turn the card over and cut back an overhanging pieces, this give a more natural look than placing the everything within the card to start with. I added a sentiment using the Wild ferns stamp set and white embossing powder.


Stamps for faux waterolour


OK, so this is one of those techniques where you never really know how it will look until you are done, something I find hard being OCD....

I started by cutting all the dies from craft foam, yes pink was the only colour I had lol, I then use a spray adhesive to mount them onto acrylic blocks.  At this point it's important to make sure that all piece are adhered the correct way round, I reversed mine.......


I then added color from the water brush markers directly onto the foam and spritzed lightly with water before stamping onto watercolor card.


I really love the look of those leaves, I couldn't achieve that with a brush if I tried.  I did the same with all the layers of the flowers. I used a heat tool between each stamping to make sure that the next color was going onto a dry surface to avoid over bleeding.

Lastly I added a sentiment using the Hang in there die and Kraft card.


I hope I've given you some ideas on how to stretch your craft stash and use your dies in new ways. Here are links to the products used in today's post


***My links to Altenew products are affiliate links, this means that I get a small commission from Altenew for each purchase made, this does not cost you any more, however it helps me be able to create more content and share inspiration.  I truly appreciate any purchase made using my links.***

Friday 3 May 2019

Stepping out of my comfort zone with Altenew's Wallpaper Art stamp set.

Happy Fri-yay, it's a bank holiday weekend and it will be my birthday on Sunday so I'm feeling bright and happy.

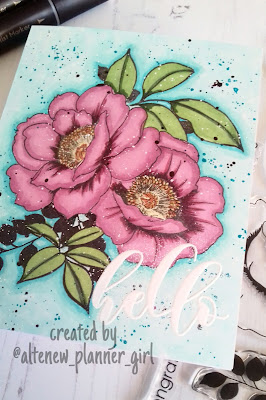
Today I am sharing a card created with Altenew's Wallpaper art stamp set


I start by stamping the blooms and foliage using as Alcohol friendly ink pad.  I coloured the flowers with Altenew's artist markers.  I then used 2 shades of blue alcohol pen to colour the background. I outlines the floral images in the darker shade and then blended it out with a lighter shade.


I used 3 colours of spray ink to add splatters, I put a little on a glass mat and then use a fine brush to flick the ink so the splatters stay small.  Lastly I added a white heat embossed sentiment using the mini hello stamp set.

This card took me around an hour to complete as it's so different from any card I normally make but it was well worth the time and effort as I am very pleased with the outcome.

Here's the links to  products used


***My links to Altenew products are affiliate links, this means that I get a small commission from Altenew for each purchase made, this does not cost you any more, however it helps me be able to create more content and share inspiration.  I truly appreciate any purchase made using my links.***

Tuesday 30 April 2019

Dance like nobody's watching with Tonic Studios

Good Morning crafty friends, today I am sharing a mixed media card I created using lots of Tonic and Nuvo goodies.

I was totally inspired by the awesome Jen Kray's post on the Tonic Global Blog and couldn't wait to get messy and make some art.


So how did I create this little beauty I hear you cry, let me walk you through the steps below.

I started with a piece of watercolour card measuring 4.52 by 6.5" and added some Clear water Aquaflow and spritzed with water. I then sprinkled some rock salt on top and gave a spritzed of the Pecan Peach mica mist and set it aside to dry.

I cut the butterfly and body from the Wings and things die set (listed below), these were coloured with Nuvo embellishment mousses in Aquamarine, Chai Latte and Coral Calypso.


I cut the word Dance from some greyboard using the Eat,Sleep, Repeat media die set and coloured with the mousses mentioned above.

Once the background was dry, I brushed off the salt (which I will keep for future use), I then rubbed some of the Coral Calypso and Aquamarine mousse around the edges to frame the background panel.

I adhered the butterfly and sentiment to the card using some wet glue. I printed the second part of my sentiment using a Dymo Label maker.


To finish the card off I added some Nuvo drops in Saddle bag (vintage) and Caribbean blue (gloss) 


Products used
Aqua flow - Clear Water
Embellishment Mousse - Aquamarine, Chai Latte and Coral Calypso
Nuvo Drops- Saddle bag (vintage drops) and Caribbean Blue
Dies - Wings and Things; Monarch and Princess wings, Butterfly and Dragonfly die, Eat, Sleep, Repeat Media dies
Mica Mist - Pecan Peach

All the products used can be purchased from Tonic's website https://tonic-studios.co.uk/ 

Tuesday 23 April 2019

3 ways with Altenew's Verdant Walk paper Pad

Happy Tuesday everyone, I hope you all had a lovely Easter break and enjoyed the sunshine.  Today's 3 ways with post is all about the Verdant Walk Paper pad from Altenew.


Here are the 3 cards I've made


Below are all the details on how I created the cards and links

Backing paper/Main feature


I decided to keep the first card as simple as could be, using one of the piece of paper as a background.  I added a sentiment from the Better together stamp set, which I heat embossed in Rose Gold.


I added a piece of tied gold thread at the top of card to complete the modern yet classic look.  I know I shouldn't have favourites but this card is so beautiful and the paper did all the work.


Die cut 3D flowers


Using patterned papers to die cut floral images creates such a fun contemporary look and the possibilities are endless. I added some inky splatters to a white card before adding the flowers and leaves with foam tape.


The sentiment comes from the Wallpaper art stamp set, which once again I heat embossed with Rose gold embossing powder.


Stamping


My final card features the Wallpaper Art stamp set which was stamped and heat embossed on to the Verdant Walk papers with Rose Gold embossing powder.


I used a piece of the paper from the pack as a background for the flowers to sit against and added a sentiment from the Love letters stamp set.

Thats all from me for today, I will be back later in the week with another 3 ways with post, whcih should have gone live last week but something didnt work.....

Products Used

Love Letters Stamp set

***My links to Altenew products are affiliate links, this means that I get a small commission from Altenew for each purchase made, this does not cost you any more, however it helps me be able to create more content and share inspiration.  I truly appreciate any purchase made using my links.***

Tuesday 9 April 2019

STAMPlorations April CAS Card challenge


Hi there, it's time for a new STAMPlorations CAS card challenge, this month we have the added color twist of  Dark Navy.

I have created a card to inspire you using the Trendy Leaves 2 and Say It Big: Joy stamps.


I used 2 shades of Navy and gold embossing to add a feel of luxury to my card. I placed all my leaves at the edge of my card to create a frame for my sentiment.

To join in with the challenge visit the link below


I have a discount code for you to use on the STAMPlorations store which will entitle you to 20% off your order, this can not be used with other discount codes

Use>>>>>>  STAMPGIRLTERRI when checking out at http://stamplorations.com/shop/

Monday 8 April 2019

3 Ways with Altenew's Adhesive Wood Veneer

Happy Monday crafty friends!  Today's edition of 3 ways with is focusing on the Sweet Hearts Adhesive Wood Veneers from Altenew.


When I first saw the Veneers I thought they were aimed solely at Scrapbookers but then I got to thinking about how they could be used in my card making.  I have used them in many ways recently and narrowing it down to just 3 ways was a nightmare, but lets just go with it...


Au Naturel


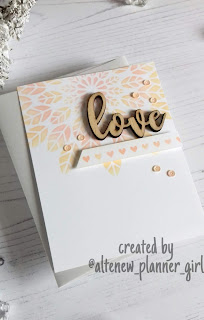
Ok, so I decided that I had to include a card with one of the veneers left natural. It has such a soft feel and looks perfect teamed up with soft pastels.


I used the leaf burst stencil along with Sunkissed and Pink Pearl ink. I then added a little strip of hearts using the Basic borders stamp set. I found some light peach sequins in my stash that complete the look.


Embossed


I used Altenew's embossing ink pad and Golden peach embossing powder to colour the Happy veneer. It's as simple as squish, sprinkle and heat!


I added a background using the Sunburst stencil, Firefly and Sunray inks. The smaller sentiments are form the Halftone happy stamp set, I heat embossed them using the Rose gold embossing powder.


Water coloured and Gilded


For my last card I really went to town, I coloured the veneer with the Limeade water color brush marker, once dry I added a distressed gilded effect using gilding flakes.


Look how cool this effect is


The background was made using the Layered Medallion A stencil and Pink Pearl, Sunkissed and Firefly inks. The smaller sentiments are from the Frosted Garden stamp set.

I have also tested out Alcohol markers, Acrylic paint and water colour paint on the veneers and all work beautifully.

Products used in today's post

***My links to Altenew products are affiliate links, this means that I get a small commission from Altenew for each purchase made, this does not cost you any more, however it helps me be able to create more content and share inspiration.  I truly appreciate any purchase made using my links.***

Sunday 7 April 2019

Altenew Celebrating Parents Card Drive Blog Hop + Giveaway


I am trilled to be joining Altenew as a guest designer for the Celebrating Parents Card Drive blgo hop and giveaway. You should have arrived here from the amazing Michelle Murray's blog, if not don't worry you can go back to the the very start at the Altenew Card Blog.

I have created two cards for the Hop, one Father focused and one for a Mother.


Men can be tricky to create for, but thankfully Altenew have got it covered, phew
Stamp set's like Trophy life and Best Dad are perfect and that's why I chose to use them for my card.


I stamped the Hammer and stars from Best Dad stamp set and coloured them with Artist markers.  For my trophy, I stamped and heat embossed with Antique silver embossing powder onto vellum, the sentiment was heat embossed in black. I finished the card with enamel dots from the New day card kit.


I love a silhouette stamp as they can be used in so many ways. Here I used the Floral Shadow set to create a faux watercolour look on Mulberry paper.  I added watercolor brush maker direct to the stamp, spritzed with water and then stamped.


 It's that easy! Look how awesome the result is, I would never have the confidence to freestyle watercolour flowers. I added a sentiment using the Fine Alphabet dies, I coloured them with Brush markers and once dry heat embossed the lower half with Platinum embossing powder.


20% of the profits earned from select stamp sets (Best Dad, Painted Rose, Extra Special, Lotus, Cross Stitch Flower, and Best Mom) by 6/16/2019 will be donated to the Food Bank of Central New York to support seniors in need.


You can find out more about the Card drive here> https://altenewblog.com/Celebrating-Parents-Card-Drive-2019


Prizes
Altenew is giving away a $30 gift certificate to 6 lucky winners! Please leave a comment on the Altenew Card Blog for a chance to win. We’ll also draw a winner to receive a $15 gift certificate from the comments left on each designer’s blog on the blog hop list below. All winners will be announced on the Altenew Card Blog on 4/17/2019.