Showing posts with label christmas. Show all posts

Sunday, 10 June 2018

Tattered Lace Pets Portrait Christmas Edition

It's Christmas in the Craft world, 
I know, I know, it's only June but we have to be prepared and now is the time to start buying all the new goodies you need for this years Christmas crafting.

Over the next couple of weeks there are going to be lots of new releases from Craft companies and I'll be sharing projects I've made with new items.

First up is the Christmas Pet Portrait collection from Tattered Lace dies.

Following on from the 2 previous Pet's Portraits collections, the guys and girls at Tattered Lace knew you'd want some cute Christmas themed animals in the collection.

Here are my samples


Here are the links to the products I used


The collection is launching Monday at 12pm on Create and Craft TV

Wednesday, 22 November 2017

Altenew's Layeed Laurel, 1 stamp set 5 ways


Thank you for stopping by today, I am sharing 5 cards I've created using Altenew's Layered Laurel stamp set.

At this time of year us crafters find ourselves trying to get lots of cards made to send to our loved ones and at times it's really hard to think of different designs, you may have already made 50 cards and your mojo has vanished.  I decided to challenge myself to make 5 cards with one stamp set (and a few extras from my stash)

Well let take a look at what I made.


This first card a something very different from me, I'm calling it a floating card.  I made a card blank from some heavy weight acetate and added a Kraft card panel in the centre, hence me calling it a floating card! I then used the small Laurel spring to create a wreath in the centre of my card with the Green fields crisp inks.

I added some small red gems to look like berries and then die cut my sentiment form Altenew's Holiday script word dies.


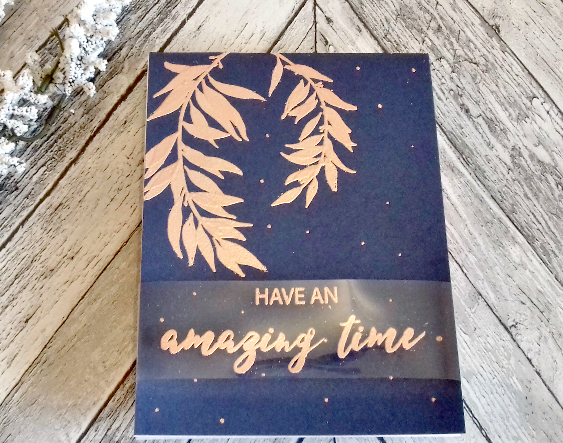
Net up is a striking Navy and golden peach embossed card. I used Altenew's Golden Peach embossing powder to emboss both the Laurel and sentiment. The sentiment is stamped on to acetate which is wrapped around the navy card before being adhered to the white card blank so that all the workings are hidden.  I also added some embossed dots to the card using an embossing pen.


I decided I wanted to go bold with my sentiment for this card so I combined the Layered Laurel with Altenew's Bold Alphabet dies.  I stamped the Laurel 5 times across the centre of my card panel using the Green fields crisp inks.  I then used the dies to cut the word "noel" out of the stamped panel.  I then cut the same word from black card stock.  On a white card blank I added a piece of gold glitter washi tape and then adhered the stamped panel. I then inlaid the black letters, this gives the card a totally flat surface.


This card was a simple one, I stamped the Laurel with the green fields inks and then used a sentiment from the Lyrical script stamp set, which I heat embossed in black.


My last card is something very indulgent, grey with lots of copper embossing. I used one of the leaf layers from the Layered Laurel stamp set to stamp a background onto some grey card using Altenew's embossing ink and then I added some copper embossing powder and set with my heat tool.

I used the Holiday script word dies to cut my sentiment, but as I wanted it to look dimensional like a piece of chipboard I cut 2 from the grey card and a third from a piece of copper embossed card. I then layered them together to give me a chunky sentiment.  I also added a second sentiment using the Lyrical Script stamp set. It reads "he will bring us goodness and light"


And that is my 5 cards with 1 stamp set.  I love trying to create different looks and feels with the same stamp set.  

Which is your favourite card? I think mine is the Navy and Golden Peach embossed card.


Wednesday, 18 October 2017

Cute Nativity with Paperbabe Stamps


Morning Crafty friends, I thought I'd share another of my cards made using the new release from Paperbabe Stamps, the Cute nativity stamp set is such a lovely set to work with and can be used in so many ways.


I stamped my image using black Versafine ink and coloured them with Spectrum Noir's Colourblend pencils. I didn't go for a perfectly shaded look as I wanted to keep that simple child-like look.


I added some stars using the Doodle stars stamps also from Paperbabe Stamps.

You can see more of my creations using the Cute Nativity stamps by clicking this link; Paperbabe Stamps Christmas Release

Thank you for stopping by today.

Friday, 13 October 2017

Paperbabe Stamps Christmas Release - Design team inspiration

I can not even begin to describe how excited I am about today's post, I am showcasing my Design Team samples for the new release from Paperbabe Stamps.

I have made so many samples that I am going to need to spread them out over a few posts, but here's a few for today.


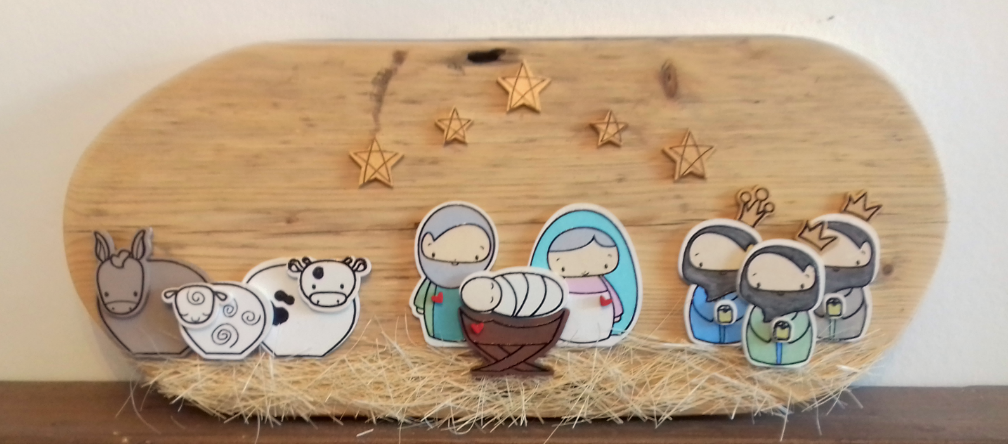
First up I have made a Nativity style piece of home decor using the Cute Nativity stamps and matching substrates.  Kim designed the to be used as a Nativity set using 4 layers of MDF per character but I decided to stretch them a little and sacrifice one of the layer so I could make this project.


I base coated the MDF  with white acrylic paint before stamping and heat embossing the characters. I use my Spectrum Aqua pens to colour them in, the colour sits perfectly on the mdf and gives a nice finish.


Are you ready for another project?


Next up I have a card made with the doodle stars mini stamps. I created a background with distress inks and Brusho acrylic mists before stamping the stars. The sentiment is from the Sparkle Bright stamp set.  I matted and layered using silver mirror and black card to complement the look.


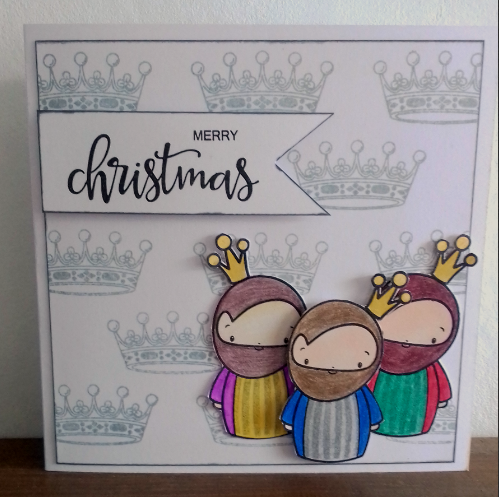
Lastly I have a card I made with the Nativity stamps and one of the new mini crown stamps. I used the crown to create a background in light grey ink and then stamped 3 little kings which I coloured Spectrum Noir pencils and then fussy cut. The sentiment is also from the Sparkle Bright set. I edged the background and sentiment using a grey pen before some of the elements to foam tape to add depth and dimension.


How cool is this new release? I still have more projects to share but I will bring you more next week.

Here's a little peek at a project coming your on Monday using the newly released Paperangel MDF substrates.


Be sure to check back on Monday morning for details of how I made them and for the full reveal.

Wow, wasn't that a blast? I still have a few more  cards that I will add over the next week so keep your eyes peeled for those.

To purchase any of the items in the release please visit Paperbabe Stamps Shop and for more inspiration visit the Paperbabe Stamps Blog


Wednesday, 11 October 2017

Layered Laurel from Altenew

Today I am sharing another of my Altenew Christmas cards.


I used the newly released Layered Laurel to create my clean and simple card. I stamped the first 3 layers of Laurel using the Green fields mini ink cubes. The forth layer was stamped using Versamark Ink and embossed with Gold embossing powder.


I added some gold pearl gems and a die cut sentient using the holiday-script-words-die. My white stamped panel was added to a gold linen card to pull the look together.

I love how easy it is to put together quick cards using layered stamped and die cut sentiments.

I hope you have enjoyed todays card, I'll be back with more very soon.

Sunday, 8 October 2017

Christmas wishes with Altenew stamps

Today I am sharing a Christmas card using a new stamp set from ALTENEW teamed up with an older set from a previous Christmas release.


I am entering this card in to the October Make it, Take it challenge from Craft Stamper
You can also join in by following this link

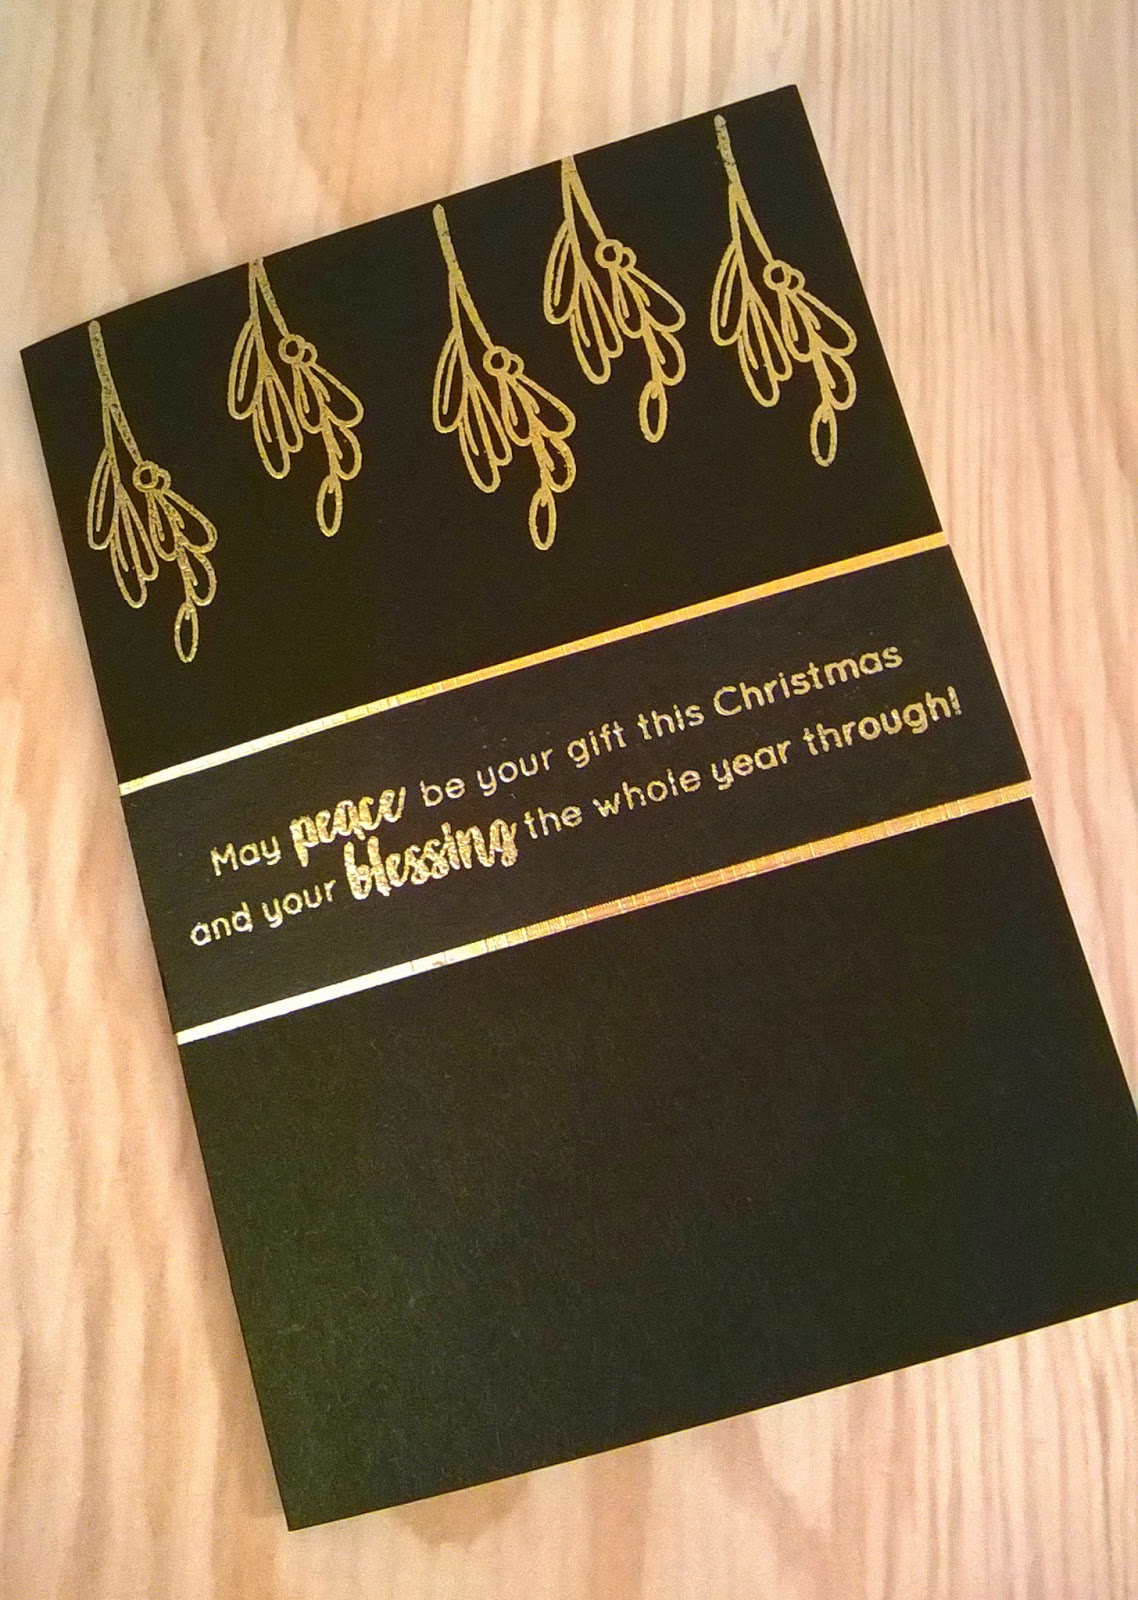
Altenew Majestic Mistletoe

I was so amazed by the beauty of Altenew's newly released Majestic Mistletoe stamp set that I couldn't wait to get my hands on it and get stamping.  The set consists of two large Mistletoe branches with multiple layers, one with berries and one without.  There are also large words which allow you to build your own sentiment.

Altenew Majestic Mistletoe

I stamped one of each of the branches using the Green fields mini ink cubes, I then fussy cut around them.  I stamped and die cut a Poinsettia flower from the poinsettia and pine set to add on top of the Mistletoe.  I die cut my sentiment from Gold linen effect card using the Holiday Script word dies.

I finished my card by adding some gold glitter washi tape and red gem gemstones.  I love the clean and complementary look of this card and can't wait to get batch making.

I will be bringing more Altenew Christmas cards to my blog over the next couple of months and hope that you will like them as much as I do.


Sunday, 18 December 2016

Merry Christmas and a Crafty new year

It's been a while since I've posted and it's been so hectic with preparing for Christmas, trying to decorate my daughter bedroom and nursing sick children but dont fret I have still had time to squeeze in some crafty, just as well or I think I would have gone crazy by now.

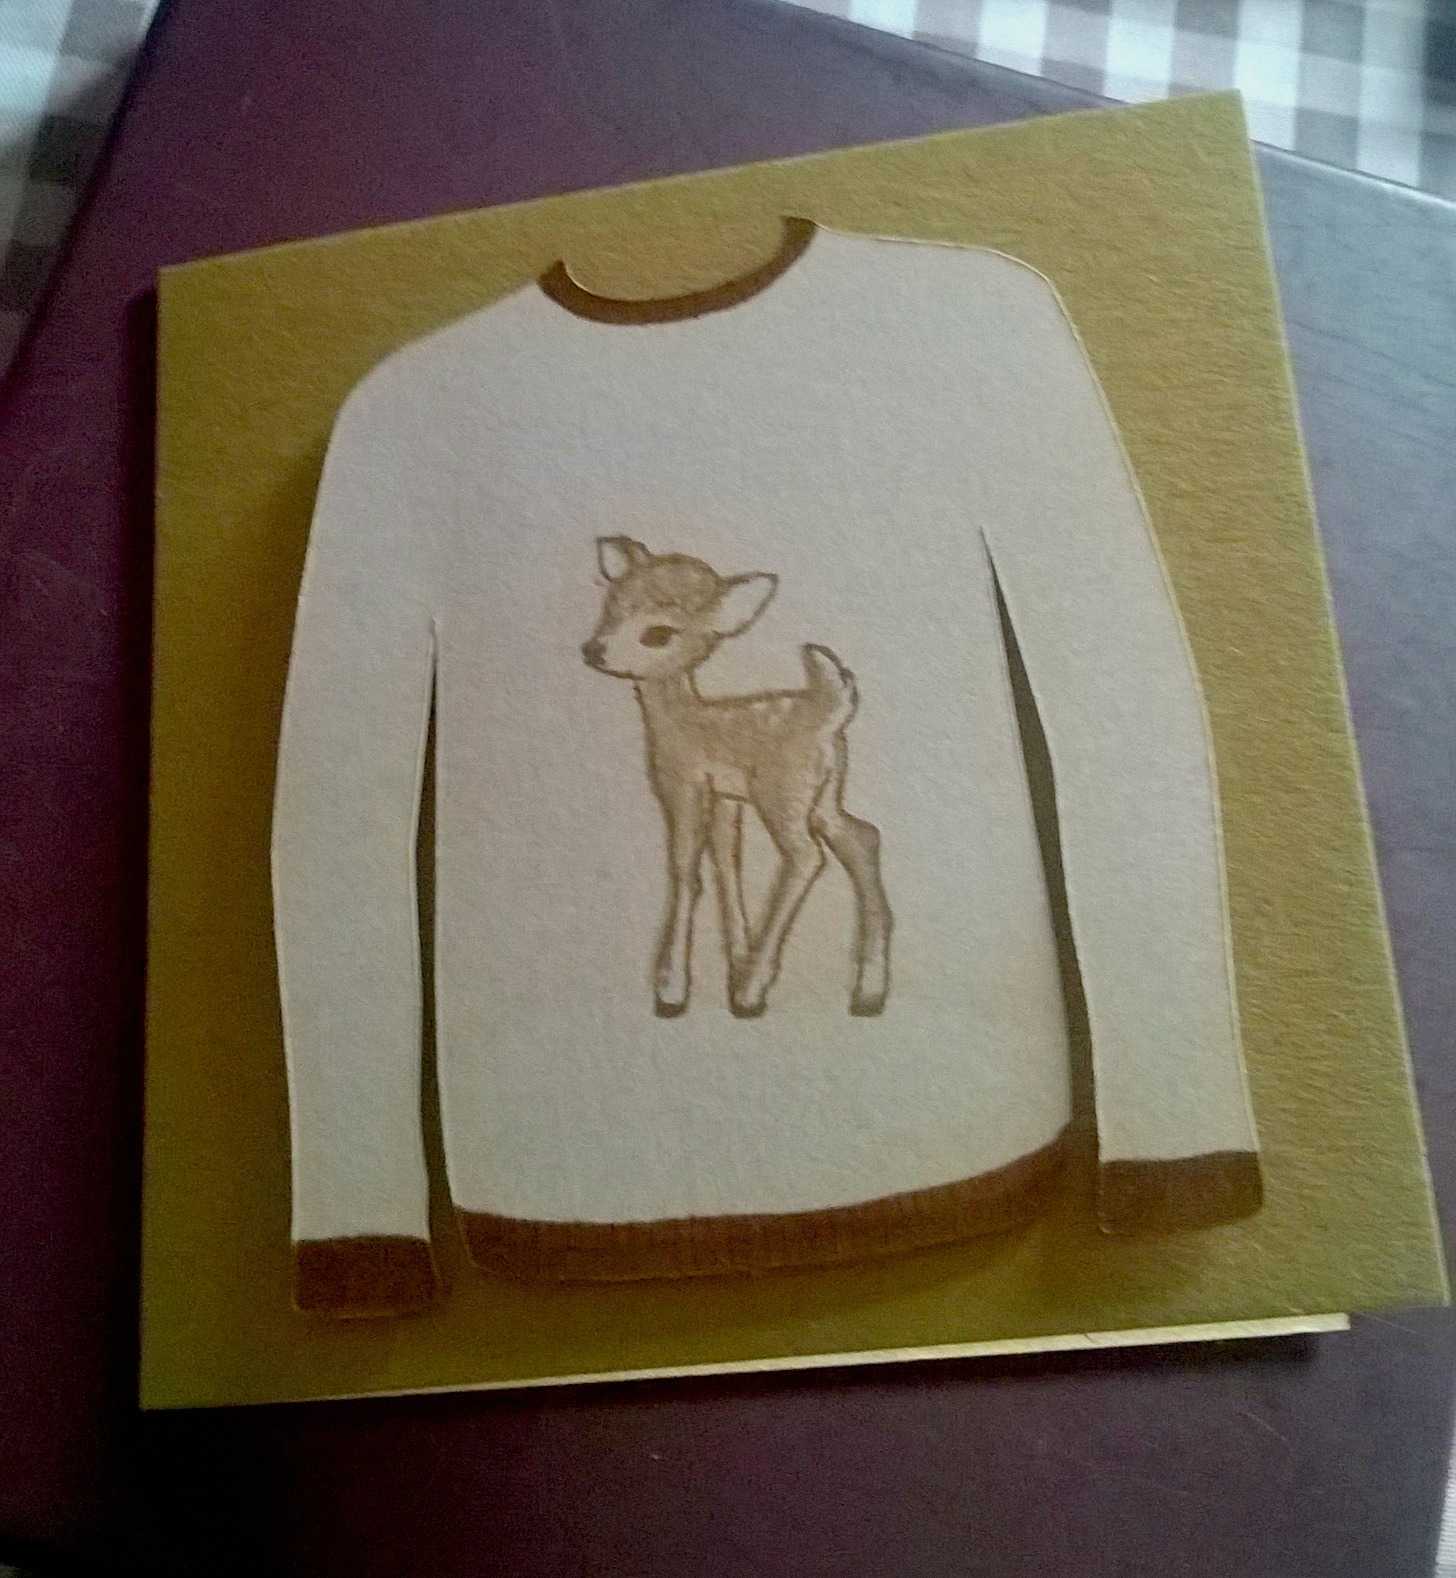
Here are some Christmas jumper cards I made this week


I used various Paperbabe stamp sets to get this look, the jumper itself was cut using my Cricut and an SVG file I found online.


I love the snowflakes on this card


I love the shades of blue on this card.

I also made some with a more natural look


I'm not sure if I'll get a chance to post again before christmas so I will wish you all a very merry christmas and a happy healthy new year,

Enjoy the holiday season, eat, drink and be merry.

Terri x 


Wednesday, 30 November 2016

Take one stamp set and see what you can do...........

This week I challenged myself to make as many Christmas cards as I could from one stamp set, Ok so maybe it was more than one set but it theory I used one image set and 2 sentiment sets.

I choose to use Altenews Poinsettia and Pine stamp set, along with the Lyrical Script sentiments and Holiday Wishes verses.  I also used the coordinating Poinsettia and Pine die set.


Black and gold embossing is so indulgent and elegant.


I love the organic feel of the white ink, Kraft card and twine.


I couldn't help going black and gold again.


A bit of gold embossing and simple red and gold line art.


This time I added some Washi tape and a few gems.


Black and Gold plus glittered vellum.


I die cut the Pine cones and leaves and embossed them in gold, I love the cute circle card.


For the this circle card I threaded bakers twine through the edge, I added a gold embossed sentiment and die cut the Poinsettia and leaves.


I used the fir sprig to create a wreath and added a sentiment in the middle.


As you can see the possibilities and style you can achieve with this set are endless. I have lots more ideas and will certainly be sharing some more ideas with you.

Friday, 25 November 2016

Paperbabe Stamps challenge #47 - Design team Inspiration

Good Morning Crafty friends

Today we are starting a new challenge over on the Paperbabe Blog

It's the much loved "Anything goes" theme.


As always there is a chance to bag yourself a crafty prize from the Talented Kim Costello at Paperbabe Stamps.


Time for my Design Team Inspiration,


I thought as Christmas is fast approaching I would dig out my Christmas stamps and create something super cute.  I decided a round card would be a little different and created a scene using the Bottle brush tree stamps, Reindeer Fusion and  Sparkle bright stamp sets. My card blank had a scalloped border with punched holes in it so I threaded a red organza ribbon through and tied a bow.  I used distress Ink's for my background and added a faux stitched border for added interest.


To join in and enter the challenge pop by the Paperbabe stamps Blog and use the link up tool to show us your creations.


Friday, 11 November 2016

Paperbabe Stamps challenge #46

Today we have a new challenge up on the Paperbabe Stamps blog

This time it's a sketch challenge


Use the above sketch to in any way to create something beautiful, flip it, rotate it, just be inspired. The flower can be any image or embellishment and the text can be any sentiment.

As always there is a chance to grab yourself a prize from Kim at Paperbabe Stamps
Use the link below to go straight to the blog and link your masterpiece.


Now on to my Design team inspiration


I created my card using

Sparkle Bright Stamp Set
Peaceful Flurries

I stamped small snowflakes using sky blue and navy blue ink, I then used a Versamark pen to draw around the edge of the main panel and sprinkled this with silver embossing powder and heat set.

I stamped the large snowflake onto white vellum using Versamark ink and embossed it in silver.

I also added an embossed sentiment and some gems.

Thank you for taking the time to stop by, I hope you will enter the challenge and I look forward to seeing your masterpiece.

Monday, 21 December 2015

A very handmade Christmas

It's beginning to feel a lot like Christmas


Hello crafty friends, A huge big Christmas hug to all of you, I don't know about you but I love Christmas, i love everything from the yummy food, the fantastic company and of course the crafting. 

This year has been a huge year for me, I have started my blog, launched a facebook page, set up a Pinterest account, joined a design team, guessed designed for a craft company and totally filled my home with handmade goodies. I have enjoyed sharing my crafty adventures and makes with you all, and most of all enjoyed hearing your feedback and seeing your creations with were inspired by mine.

I thought I'd share some of my Christmas makes with you


Some little felt decoratoins I made with my children


My children advent tree


Lots of handmade cards to send to family and friends


Hand painted folk art Baubles


Folky Christmas cards


Embossed Kraft gift tags


Decopatched stag


Christmas bunting


Some of the decorations on my tree


A little decopatched stocking


Tree bunting


And of course lots or presents waiting to be opened.


Wow, as you can see it's been a busy period for me and my crafting but so worth it.  There is still some baking to do and a trip to London to visit my family and then I can sit back and enjoy fun and games with my children.


I wish you all a merry Christmas and a happy and healthy new year,  I hope Father Christmas brings you some lovely presents and you have fun and make lots of memories.

I will be back on 30th December with an announcement!


Tx